 Image search results - "A70" |
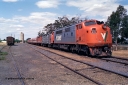
118-18777 viewsCobram station yard overview, stabled up passenger train, V/Line broad gauge A class A 70 Clyde Engineering EMD model AAT22C-2R serial 84-1187 rebuilt from B 70 Clyde Engineering EMD model ML2 serial ML2-11 with PH class power van PH 451, D van and Z set Z 56, D van in yard and silos in distance.
|
|
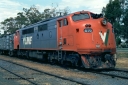
118-19715 viewsCobram, V/Line broad gauge A class A 70 Clyde Engineering EMD model AAT22C-2R serial 84-1187 rebuilt from B 70 Clyde Engineering EMD model ML2 serial ML2-11 on stabled up passenger train.
|
|
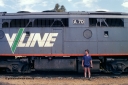
118-21726 viewsCobram, V/Line broad gauge A class A 70 Clyde Engineering EMD model AAT22C-2R serial 84-1187 rebuilt from B 70 Clyde Engineering EMD model ML2 serial ML2-11, mid shot of fuel tank and battery box, Dave Hardidge in shot.
|
|
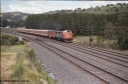
126-34578 viewsKilmore East, Sunday Creek Rd overbridge, V/Line A class A 70 Clyde Engineering EMD model AAT22C-2R serial 84-1187 rebuilt from B 70 Clyde Engineering EMD model ML2 serial ML2-11 and N set, down broad gauge Albury pass.
|
|
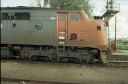
127-10573 viewsWodonga yard broad gauge V/Line A class A 70 Clyde Engineering EMD model AAT22C-2R serial 84-1187 rebuilt from B 70 Clyde Engineering EMD model ML2 serial ML2-11, stabled near B Box, cab side view.
|
|
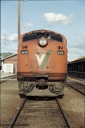
127-11548 viewsWodonga yard broad gauge V/Line A class A 70 Clyde Engineering EMD model AAT22C-2R serial 84-1187 rebuilt from B 70 Clyde Engineering EMD model ML2 serial ML2-11, stabled near B Box, front view.
|
|
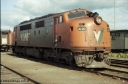
127-12587 viewsWodonga yard broad gauge V/Line A class A 70 Clyde Engineering EMD model AAT22C-2R serial 84-1187 rebuilt from B 70 Clyde Engineering EMD model ML2 serial ML2-11, stabled near B Box, N set 10 behind it, 3/4 view.
|
|
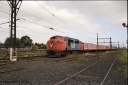
141-1-20604 viewsSunshine, broad gauge V/Line A class loco A 70 Clyde Engineering EMD model AAT22C-2R serial 84-1187 rebuilt from B 70 Clyde Engineering EMD model ML2 serial ML2-11 leads a 4 car H set with a PH power van on the rear as it heads into platform 3 with a down Bacchus Marsh pass.
|
|
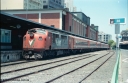
145-04593 viewsSpencer Street Station dual gauge Platform Number 1, broad gauge V/Line A class A 70 Clyde Engineering EMD model AAT22C-2R serial 84-1187 rebuilt from B 70 Clyde Engineering EMD model ML2 serial ML2-11 with double N set.
|
|
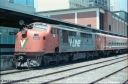
145-05608 viewsSpencer Street Station dual gauge Platform Number 1, broad gauge V/Line A class A 70 Clyde Engineering EMD model AAT22C-2R serial 84-1187 rebuilt from B 70 Clyde Engineering EMD model ML2 serial ML2-11.
|
|
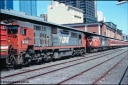
145-12618 viewsSpencer Street Station dual gauge Platform Number 1, broad gauge V/line locos N class N 452 'Rural City of Wodonga' Clyde Engineering EMD model JT22HC-2 serial 85-1220 and A class A 70 Clyde Engineering EMD model AAT22C-2R serial 84-1187 rebuilt from B 70 Clyde Engineering EMD model ML2 serial ML2-11 with N set.
|
|
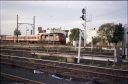
153-1-01613 viewsSunshine, looking across tracks at V/Line broad gauge A class loco A 70 Clyde Engineering EMD model AAT22C-2R serial 84-1187 rebuilt from B 70 Clyde Engineering EMD model ML2 serial ML2-11 and N set with an up passenger train on the Bendigo lines.
|
|
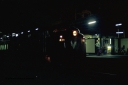
153-3-22548 viewsGeelong station building and platform, night shot, V/Line broad gauge passenger train, down Warrnambool with A class A 70 Clyde Engineering EMD model AAT22C-2R serial 84-1187 rebuilt from B 70 Clyde Engineering EMD model ML2 serial ML2-11 pauses at platform one.
|
|
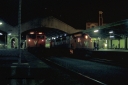
153-3-23575 viewsGeelong station building and platform, night shot, V/Line broad gauge passenger train, down Warrnambool with A class A 70 Clyde Engineering EMD model AAT22C-2R serial 84-1187 rebuilt from B 70 Clyde Engineering EMD model ML2 serial ML2-11 pauses at platform one with N class N 467 'City of Stawell' Clyde Engineering EMD model JT22HC-2 serial 86-1196 in platform two.
|
|
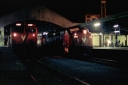
153-3-24511 viewsGeelong station building and platform, night shot, V/Line broad gauge passenger train, down Warrnambool with A class A 70 Clyde Engineering EMD model AAT22C-2R serial 84-1187 rebuilt from B 70 Clyde Engineering EMD model ML2 serial ML2-11 pauses at platform one with N class N 467 'City of Stawell' Clyde Engineering EMD model JT22HC-2 serial 86-1196 in platform two.
|
|
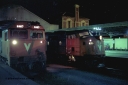
153-3-25515 viewsGeelong station building and platform, night shot, V/Line broad gauge passenger train, down Warrnambool with A class A 70 Clyde Engineering EMD model AAT22C-2R serial 84-1187 rebuilt from B 70 Clyde Engineering EMD model ML2 serial ML2-11 pauses at platform one with N class N 467 'City of Stawell' Clyde Engineering EMD model JT22HC-2 serial 86-1196 in platform two, cab shot.
|
|
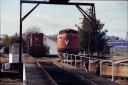
165-08637 viewsWodonga loco depot, turntable and pit, V/Line broad gauge locos framed through structure, Y class Y 137 Clyde Engineering EMD model G6B serial 65-403 and A class A 70 Clyde Engineering EMD model AAT22C-2R serial 84-1187 rebuilt from B class B 70 Clyde Engineering EMD model ML2 serial ML2-11.
|
|
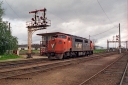
166-01657 viewsWodonga, V/Line broad gauge A class loco A 70 Clyde Engineering EMD model AAT22C-2R serial 84-1187 rebuilt from B class B 70 Clyde Engineering EMD model ML2 serial ML2-11 shunts out light engine past A signal box and semaphore signal post 19.
|
|
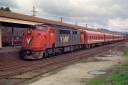
166-03654 viewsAlbury, V/Line broad gauge A class A 70 Clyde Engineering EMD model AAT22C-2R serial 84-1187 rebuilt from B class B 70 Clyde Engineering EMD model ML2 serial ML2-11 arrives at the Victorian platform with an empty carriage set to work an up passenger train to Melbourne.
|
|
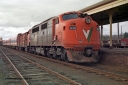
166-04587 viewsAlbury, V/Line broad gauge A class A 70 Clyde Engineering EMD model AAT22C-2R serial 84-1187 rebuilt from B class B 70 Clyde Engineering EMD model ML2 serial ML2-11, having run round the consist, A 70 sits on the point at the Victorian platform with an up passenger train to Melbourne.
|
|
|
|
 Login


